How to Create a Transparent Background in Photoshop – Do you know the most common reason for what one wants to know how to create a transparent background in Photoshop? An image with a transparent background offers you the flexibility to use it everywhere regardless of the background color, whether it be a web page or a printed item.
So an image with no background or transparent background is better than an image with a colored background for a wide range of digital and print applications.
Today we are here to guide you clearly as you can create a transparent background in Photoshop yourself flawlessly!
Ways To Get A Transparent Background In Photoshop?
The most usual ways to turn your image’s background transparent in Photoshop are:
Employing the Remove Background Tool
Using the Selection Tools
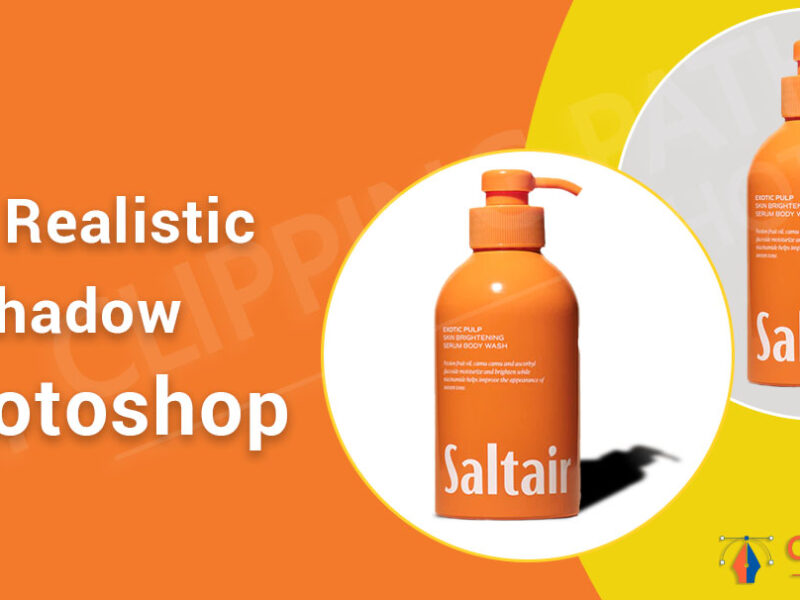
The first one is the quickest way for completing the task, but it may not be a tool for every image, i.e., an image with a shadow, or a complex image of some cookies or toys. Here is the second way to go, which involves selecting the subject manually using 3 selection tools namely:
2.1 Magic Wand Tool
2.2 Quick Selection Tool
2.3 Pen Tool
1. How To Use The Remove Background Tool
Making an image background transparent in Photoshop using the Remove Background tool is the easiest way to go. Follow the steps below to complete the easiest background removal:
Step 1: Open an image in Photoshop.
Step 2: Use “Ctrl + A”, “Ctrl + C”, and “Ctrl + V” to duplicate the image into a new layer (shown as “Layer 1” in the Layers palette).
Step 3: Click the eye icon of the “Background” layer in the Layers palette to hide it.
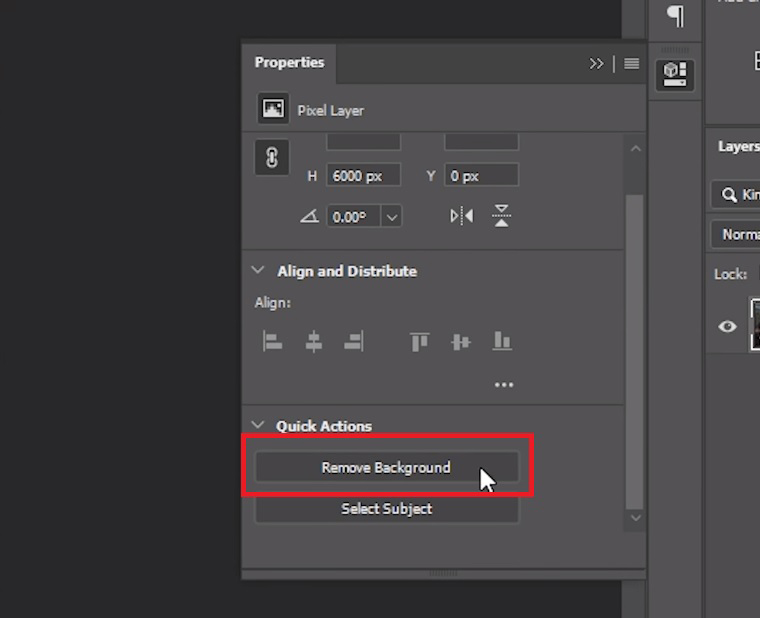
Step 4: Select “Properties” in the “Window” menu (at the top) to open the Properties palette. Scroll down to find the hidden “Quick Actions” and then click on “Remove Background”.
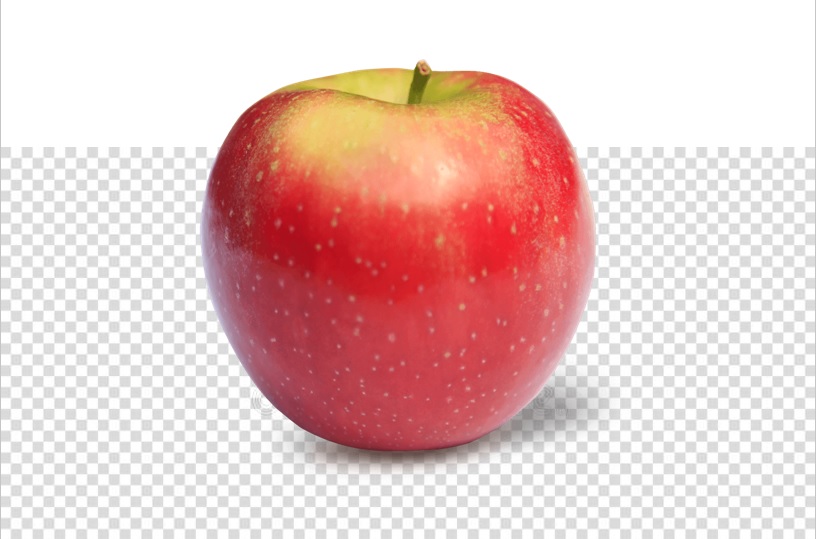
Step 5: The newly created checkerboard pattern around the image is the transparent background you are working for. Just save the file in Photoshop (*.PSD; *.PDD) or PNG (*.PNG; *.PNS) format. Done!
2.1 How To Use The Magic Wand Tool
Creating a transparent image background in Photoshop using the Magic Wand Tool is also a very easy way. Here are the actions to follow:
Step 1: Open your desired image in the Photoshop app.
Step 2: In the Layers panel, drag the “Background” layer down to the “Create a new layer” icon to duplicate the layer.
Step 3: Now click the layer visibility icon of the “Background” layer to make it hidden.
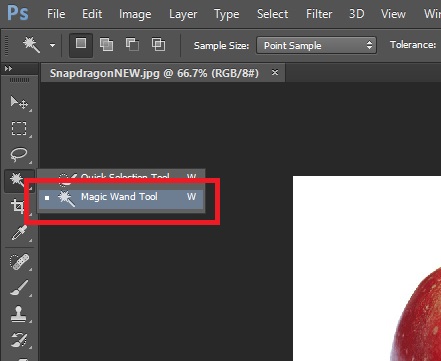
Step 4: Right-click on the fourth tool down from the Tool palette on the left side (in Photoshop’s default setting), then click on the “Magic Wand Tool”.
Step 5: Click the Magic Wand Tool on the background you want to remove. It will select the whole background or a region (with a similar color).
Step 6: If your selection can’t grab the full background, use the “Tolerance” setting (placed at the top) to increase the tool’s selection ability or sensitivity by increasing the value.
Step 7: Add additional selections if needed (if any portion of the background is not selected yet). To do this, click “Add to selection” in the Magic Wand Tool’s menu at the top.
Step 8: Go to the “Select” menu at the top. Click on “Select and Mask”. Click “Invert” from the menu on the right side..
Step 9: Under the “Global Refinements” menu, you can make adjustments to your selection to remove the blue or bad-looking edge showing around the object.
Step 10: Go down to “Output Settings”, select “Layer Mask” and click “OK”. It’s done, save the file!
2.2 How To Use The Quick Selection Tool
The Quick Selection Tool works best for images with little more complex objects or backgrounds. Here are the steps to pass:
Step 1: Let’s open an image with a complex background using Photoshop.
Step 2: Duplicate the “Background” layer using the “Create a new layer” icon.
Step 3: Hide the visibility of the “Background” layer.
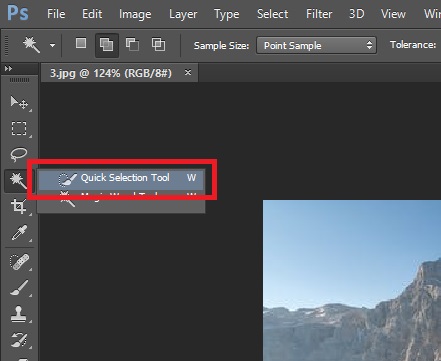
Step 4: From the fourth tool down in the Tool panel, choose the “Quick Selection Tool”.
Step 5: Adjust the size of the tool.
Step 6: Start selecting (by clicking) the parts of the background you want to eliminate until the background is fully selected.
Step 7: If the selection goes beyond the background, refine it using “Subtract from selection” in the Quick Selection Tool menu at the top.
Step 8: Click “Select and Mask” from the “Select” menu and click “Invert” on the menu showing on the right side.
Step 9: To make your image more seamless with any background you can refine the selections from the “Global Refinements” menu.
Step 10: Select “Layer Mask” from the “Output Settings”, press “OK” and save it. That’s all had to do!
2.3 How To Use The Pen Tool
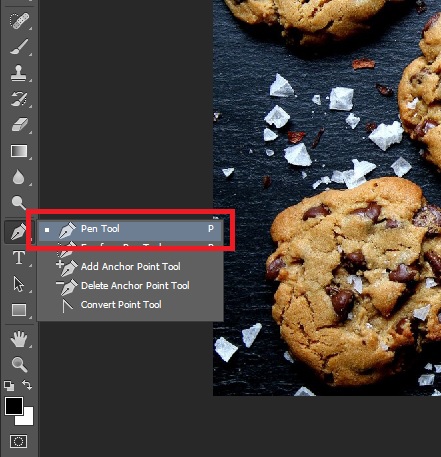
For the most controlled and detailed cutout, the Pen Tool is applied. This method takes more time than previous methods. But you can achieve an excellent result, in fact, the best result! Let’s see how long it takes to finish:
Step 1: At first, open any image with a more complex background in Photoshop.
Step 2: Dragging the “Background” layer on the “create a new layer” icon, and make a duplicate of it.
Step 3: Hide the “Background” layer.
Step 4: Select the “Pen Tool” from the Tool panel (the tool looks like a pen).
Step 5: Make an outline (path) of the object using the tool.
Step 6: Go to the “Paths” window in the Layers panel and click on the “Load path as a selection” icon.
Step 7: Now use the “Select and Mask” option from the “Select” menu to open the Select and Mask workspace.
Step 8: Do some refinements to the selection (if required).
Step 9: In “Output Settings”, make sure that “Output To” has “Layer Mask” selected and hit “OK”.
Step 10: The background is removed, save the file!
Why do we need to use a Transparent Background?
The transparent background makes an image more suitable and flexible to use. When you promote your product with a transparent background, it brings more focus to the audience. So, the chances increase of getting more sales.
If you are connected with E-commerce, it will assist you to boost your sales and attract more potential buyers. Also, an object with a transparent background is easy to replace with another background. So, you can place it in any suitable background with ease.
Get Background Removal Service
Do you have bulk images and do you want to get a transparent background for those pictures? You can try Background Removal Service from CPP Graphics Media. You can get this service for any type of object. ABC can remove the background perfectly from any type of complex object.
Moreover, a money-back guarantee is also available. So, you only need to pay, when you feel satisfied. Would you like to have a try? Let’s get a free trial now or you can ask for a quote.
Who needs Background Removal Service?
Photographer
Online Shoppers
Jewelry Business Owners
Advertisers
Equipment and accessories sellers
Real Estate Investors
Print Media
FAQs
Q1: What is the transparent background?
Answer: A transparent back-grounded image indicates an image that is hyaline and can exhibit the effect of anything placed behind it. One can see the background of a web page through the transparent areas of a transparent image. That is you can see it and you also can see what is underneath it.
Q2: Why is a transparent image important?
Answer: A transparent image can be used anywhere on a web page as its background does not clash or compete with the background color of that web page. Transparent background opened the possibility to make non-rectangular images for the web.
Q3: What is the use of the transparency feature of an image?
Answer: The use of the transparency feature of an image in digital applications includes website logo/photo, email signature, presentation, video, etc.
The use in print applications includes apparel, packaging, stickers, decals, letterhead, brochures, postcards, etc.
Q4: How to make the background transparent in Photoshop CC?
Answer: Though Photoshop CC has brought some improvements and new features, the ways to make a background transparent are the same as we described above.
Q5: How to make a white background transparent in Photoshop?
Answer: Open a white background image in Photoshop. Then follow any of the ways we shared above to make the background transparent.
Q6: How to save transparent backgrounds in Photoshop?
Answer: After finishing the background removal processes, go to the “File” menu and select the “Save As..” option. Choose the file format, e.g., Photoshop or PNG format. Now hit the “Save” button, then press “OK”.
You can also choose “Export”, then “Quick Export as PNG”. Another option is shown as “Export as..”, which offers some other file formats along with PNG. Click on “Export All..”, then “Save” in your desired location.
Conclusion
We have talked about the usual processes above to help you out with how to create a transparent background in Photoshop. So it’s your turn to make the wonder out of your photo with a decent background. And we hope you can do it now following our easy-to-implement guidelines.
But you may find some difficulties while working or anything that should have been included, excluded, or corrected. Whatever comes in your finding, please advise us in the comment segment, so we can further assist you.
How to Create a Transparent Background in Photoshop
Published By
CPP Graphics Media
You May Also Like Our One of Famous Post
How to create a clipping mask in Photoshop


Hey there! I stumbled upon your article on “How to create a transparent background in Photoshop” and I must say that it was a very helpful read. As someone who is new to Photoshop, I often find myself struggling with basic tasks like this, and your step-by-step guide made it very easy to follow.
I particularly appreciated the section on creating a transparent background for logos. As a blogger who often works with various brands, it’s important for me to have a logo that looks clean and professional on my website. Your instructions on how to remove the background from a logo were clear and concise, and I was able to apply them to my own logo with ease.
Overall, I just wanted to say thank you for sharing your knowledge and expertise with us. Your article has definitely helped me improve my Photoshop skills and I look forward to reading more of your content in the future. Keep up the great work!
Hey there!
I stumbled upon your blog post on how to create a transparent background in Photoshop and I must say, you did an amazing job breaking down the process step-by-step. As a graphic designer, I’ve been using Photoshop for quite some time now but there are always new techniques to learn and your article was really helpful in that regard. I just wanted to say thanks for sharing your knowledge and expertise with us. Your article was easy to follow and understand, and I look forward to reading more from you in the future!